At Ameritex, we know welding. When a fabricated metal part requires welding, engineers add welding callouts to the print to let the fabricator know important details like weld position, dimensions and geometry of the weld, and more. In this guide, we will discuss what information is included in a welding callout, and how choosing the right welding callouts for your design can save you time and money on your next custom metal fabrication project.
The Anatomy of a Welding Callout
The purpose of a welding callout is to give the welder all of the information they need to create a weld that satisfies all of the design requirements for the part. We use the AWS and ASME standards for welding, which are widely accepted standards acrossthe industry in the United States.
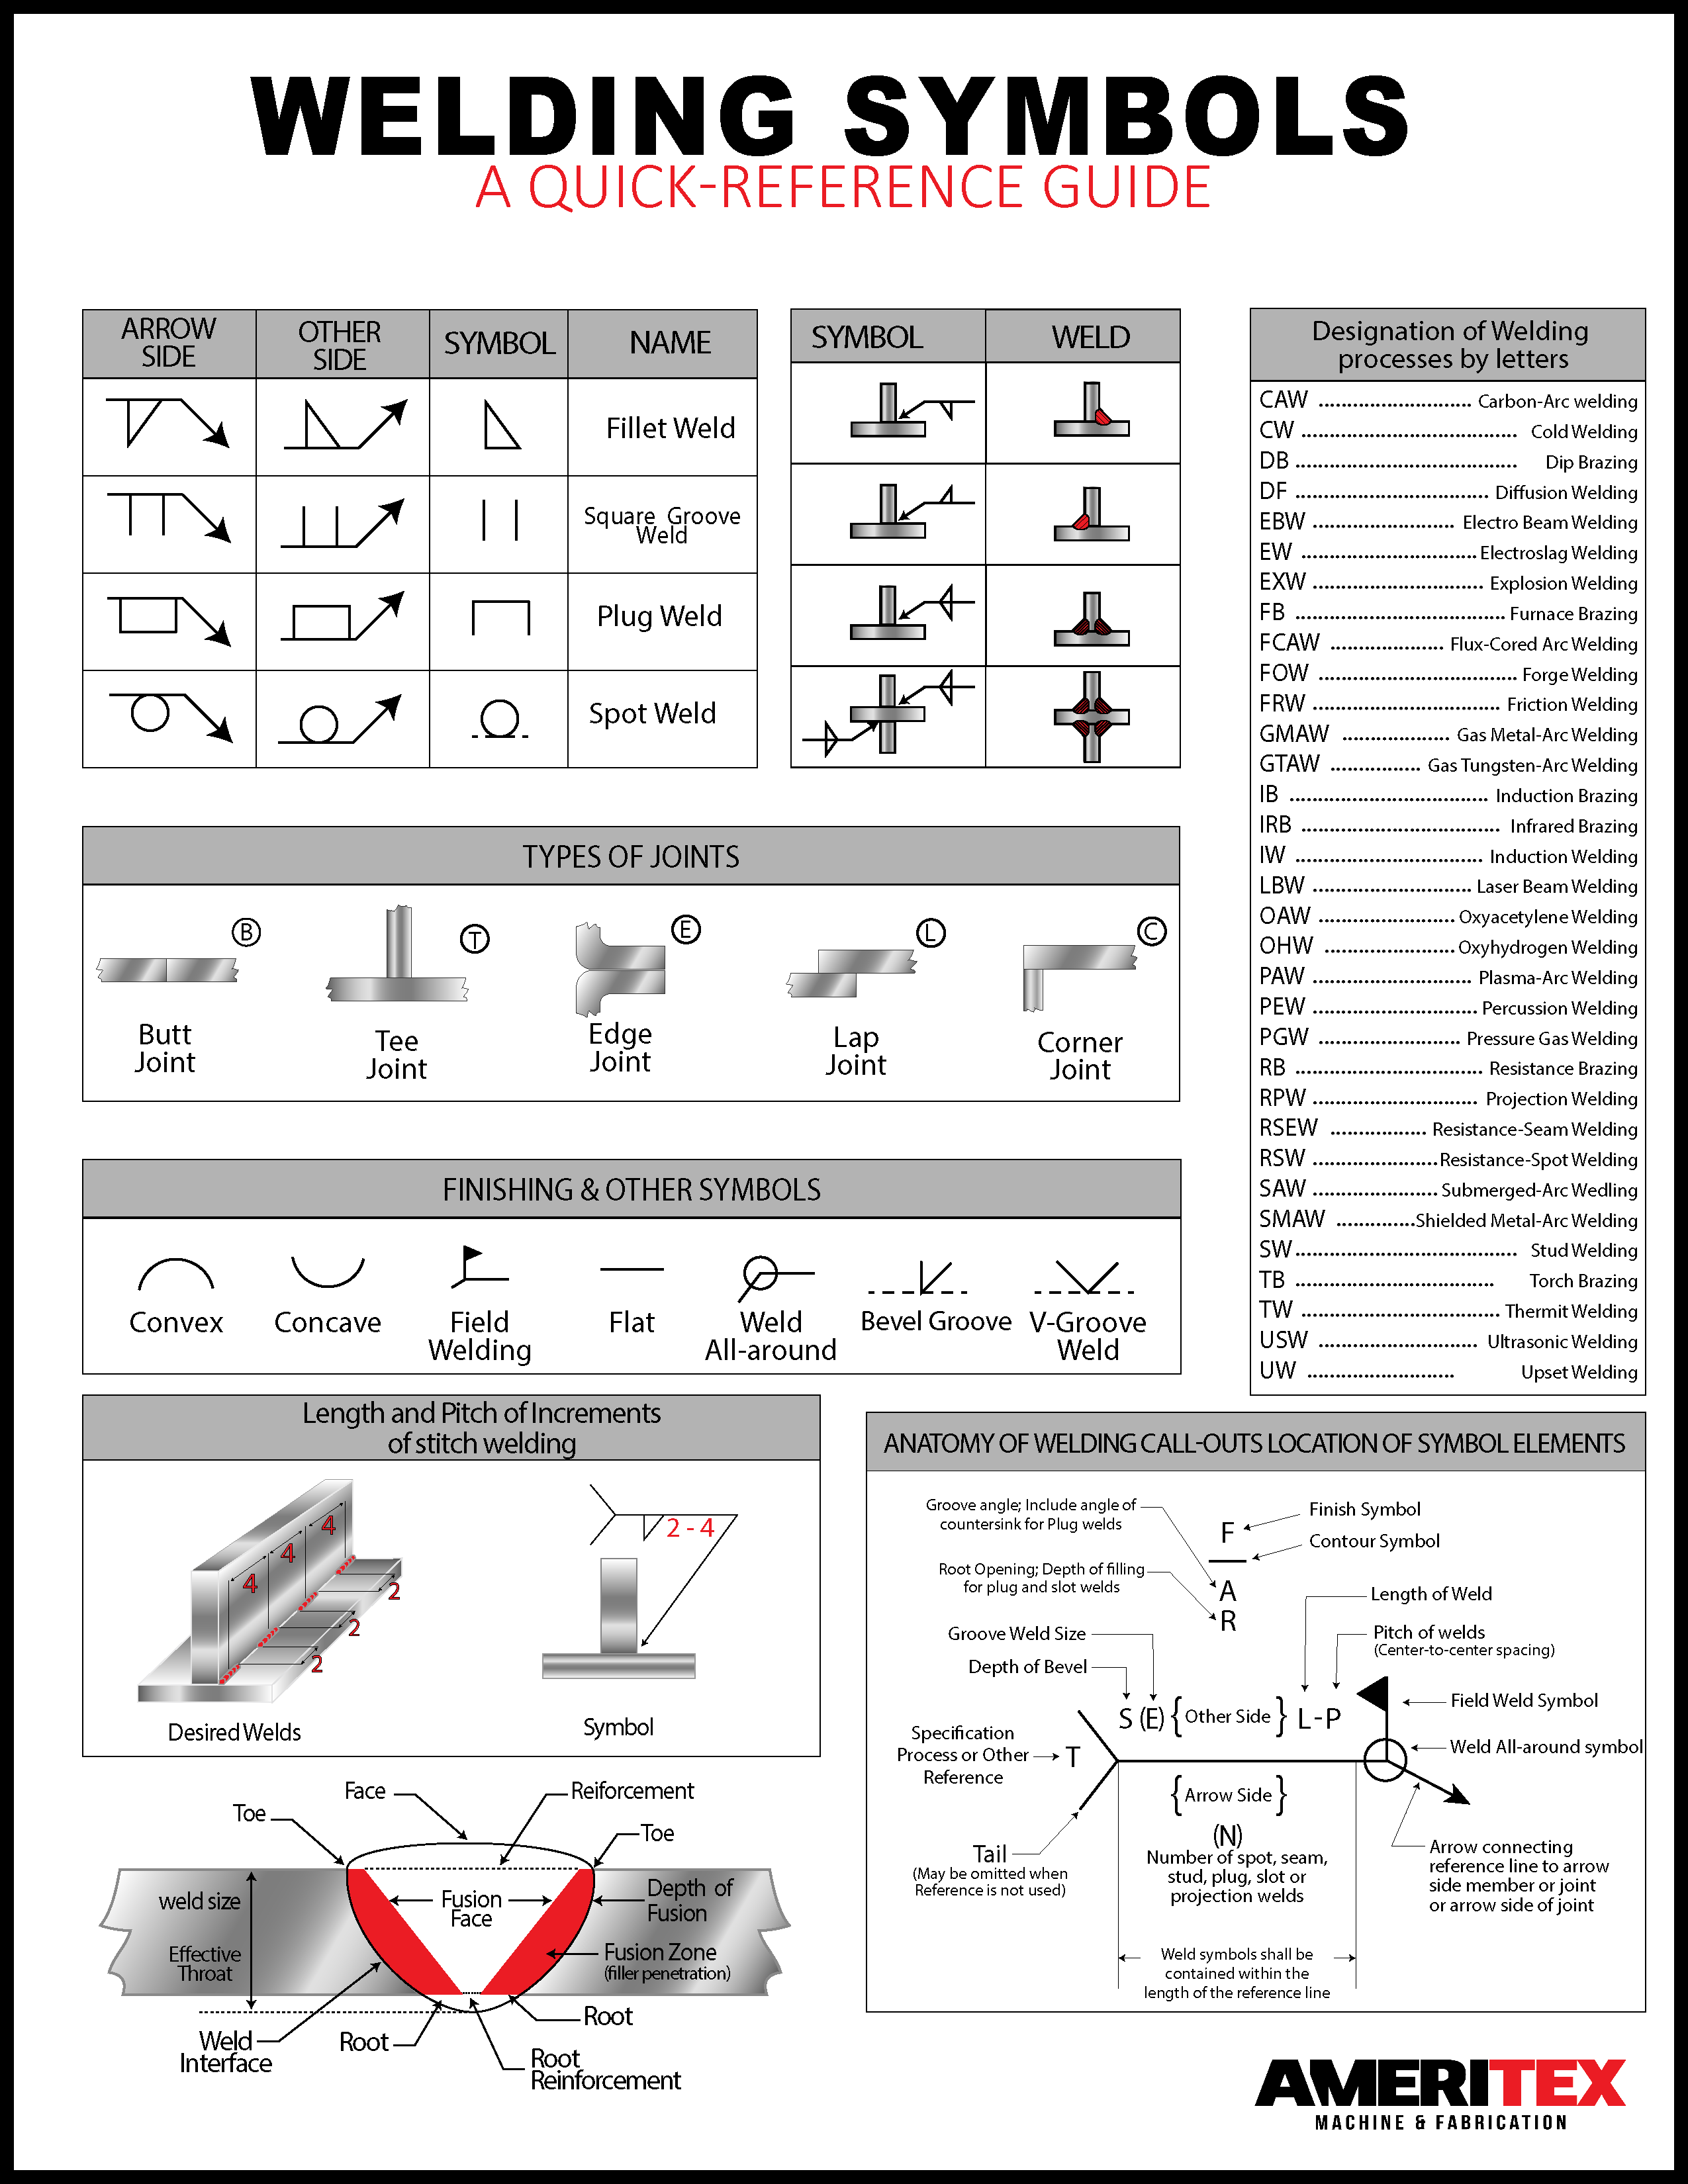
 The welding symbol consists of three primary parts:
- Arrow Line: The arrow line points to the joint on the drawing that this welding symbol refers to.
- Reference Line: The reference line serves as the centerpoint of the welding symbol, and is where key information such as the joint design, the weld pattern, the weld size, etc. As shown in the diagram below, there are two sides to any joint: the “arrow side” and the “other side”.
- Arrow Side: The arrow side is the side of the joint that the arrow points to. In the AWS and ASME standards, the information for the arrow side will be included below the reference line.
- Other side: The other side is the side of the joint opposite where the arrow points to. In the AWS and ASME standards, the information for the other side will be included above the reference line.
- Tail: The tail is used to provide welders with additional information for which there is not a designated place on the reference line.

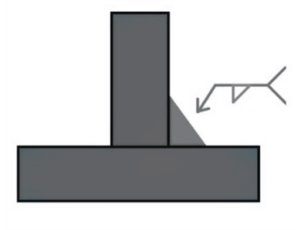
Different types of welds are represented with different diagrams. Below is an example of a welding symbol depicting a fillet weld on the arrow side:
If you’d like to learn more about welding symbols, check out Ameritex’s handy Welding Symbol Reference Sheet!
How to Choose the Right Callout
The process for choosing the right welding callout is similar to the process for choosing the right tolerance for your design. The first step is to determine what the true requirements of your design are.
There are many different kinds of welds, with spot welds, stitch welds, and seam welds being three of the most popular. It can be tempting to think that all joined surfaces should be fully seam welded from end to end – and there are situations where this is in fact the right choice, such as applications with strict structural or load requirements, or applications needing corrosion resistance. However, seam welds are not appropriate for every situation. For example, seam welding creates a lot of heat, and can potentially warp materials that are too thin.
The right welding callout for your design ultimately depends on the end use of the design. At Ameritex, we partner with our customers to help them select the right welding method for the job. We have decades of experience in custom metal fabrication, so we can suggest welding methods that will save time and money. For example, for applications that do not require a part to be airtight, a stitch weld can typically offer the same performance as a seam weld while requiring significantly less weld time, and therefore a lower cost.
If you have a project that needs welding, request a quote today! And when you request your quote, send us as much contextual information as you can about the intended end use of the part or product you’re designing. Our welding experts are happy to work with you to select the right welding approach that will satisfy your project’s requirements, while simultaneously minimizing cost and lead time.
